Ok, I'm really not going fishing, but I am taking a couple days off from blogging. I won't be gone for long though... and hopefully when I return, I'll have at least one good story to tell you about my 20 year high school class reunion!!
While I'm gone, I am sorry to say I am not leaving you with food... BUT, I will leave you with this sign...it made me laugh out loud!
Ciao!
One Year Ago: Chorizo Sliders with Chipotle Mayonnaise
Two Years Ago: Lemon Dill Tilapia
My 20 year high school class reunion is this weekend. I honestly cannot believe that I have been out of high school for 20 years! Boy have the years flown by. Some really good ones and some really bad ones. But all in all, I cannot complain, it could have been SOOO much worse!! I am from a pretty small town in Nebraska, so almost everyone I graduated with, I basically grew up with. Some of the people I graduated with, I went to preschool with!! It's just crazy to think that I saw them almost every day of my life for 13+ years, then nothing for 20.
Listen to me babble! lol I sound like an old lady!! Sorry, I just start thinking about the years and I'm shocked at how fast they have gone by. Reminds me to cherish all the moments I can. Like this steak. Definitely a moment in time to cherish - especially with the cheesy butter melting on top of it!!! YUM!
Grilled Steaks with Garlic Herb Cheesy Butter
Created by Jenn's Food Journey
- Serves 2 -
Printable Recipe
Ingredients:
1 Tablespoon unsalted butter, softened
1 1/2 Tablespoons Boursin garlic herb cheese
2 New York Strip Steaks (or whatever cut you want)
1 teaspoon kosher salt
1/2 teaspoon black pepper
1/2 teaspoon paprika
1/4 teaspoon ancho chile powder
Directions:
In a small bowl, mix together the butter and cheese until well combined. Cover and refrigerate until ready to use.
In another small bowl, mix together the salt, pepper, paprika and ancho until well combined. Sprinkle evenly over both sides of the steaks. Cover and refrigerate for 1 hour. Remove and let sit at room temperature 30 minutes before you are ready to grill them.
Preheat grill to 400 degrees. Clean and oil grill grates. Place the steaks directly over the fire and grill 5-10 minutes per side depending on the thickness and the doneness you desire. Remove from grill and allow to rest for 5 minutes. Scoop a heaping tablespoon of the butter onto each steak and enjoy!
One Year Ago: Jalapeno Beef Kabobs with Roasted Garlic Aioli
Two Years Ago: Strawberry Ice Cream
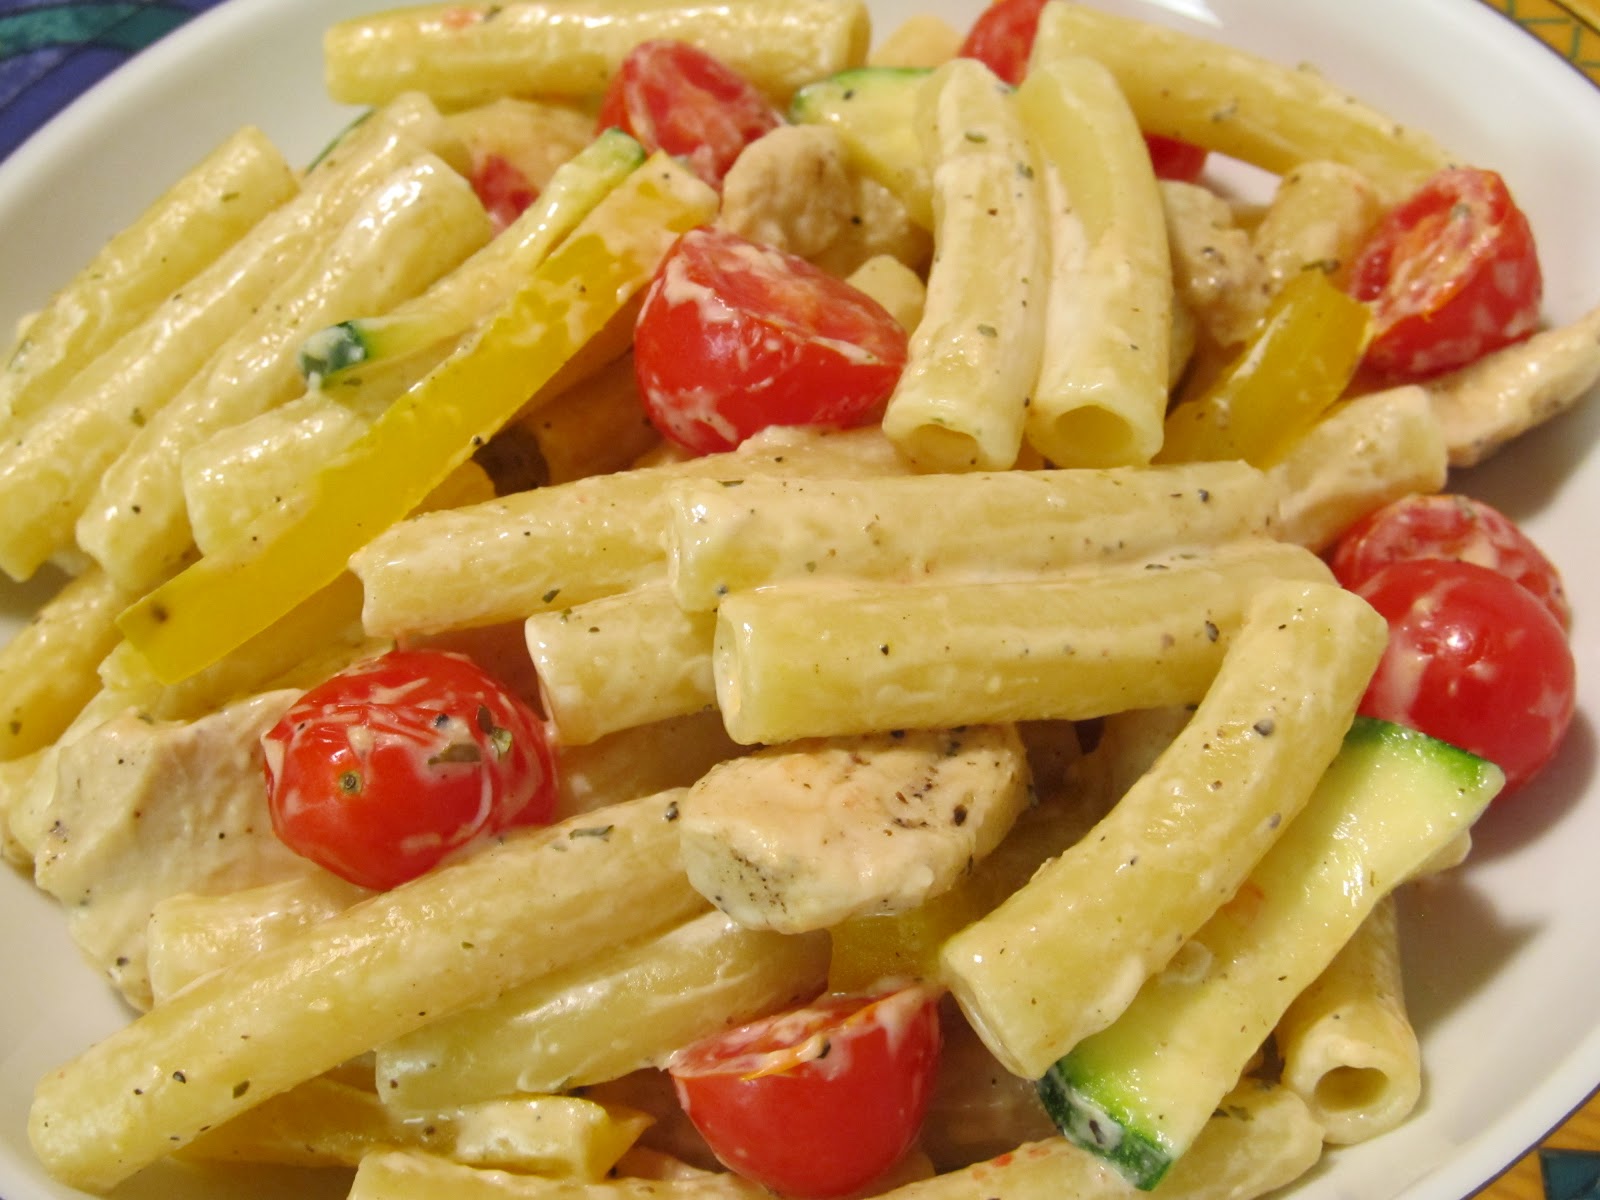
Unfortunately, I think the pictures may make this pasta look a tiny bit dry. But let me tell you... it was not. It was perfectly tasty and wonderful. The garlic and herb cheese spread used here just adds that perfect creaminess to the pasta without adding a lot of heaviness like a thick cheese sauce would. This truly is a very easy summer dish.
And, just because you know I love to use the same ingredients in different dishes - I mean it saves money and you waste less food - stop by tomorrow when I help you use up some of the rest of the cheese in a completely different type of dish.
Easy Summer Veggie Pasta
Adapted from Cook's Country
Printable Recipe
Ingredients:
10 oz ziti pasta
1 zucchini, halved lengthwise and sliced 1/4" thick
1 yellow pepper, thinly sliced
1 1/2 cups cherubs or grape tomatoes, halved or quartered
3 Tablespoons Boursin garlic and herb cheese
1 cooked chicken breast, cut into bite size pieces
salt and pepper
Directions:
Cook pasta according to package directions. Drain, reserving 1/2 cup of pasta water; set aside.
Spray a non-stick pan with cooking spray. Over medium (or medium low) heat, add the zucchini and saute for 2 minutes. Add the yellow pepper and continue sauteing another 2 minutes. Add the cherry tomatoes and let cook another 2-3 minutes or just until the tomatoes are heated through. Remove from heat and add to cooked pasta along with the cooked chicken. Stir in the cheese. Toss to combine. If pasta is too dry, add reserved pasta water. Serve with warm crusty bread and enjoy!
One Year Ago: Potatoes with Lima Bean Gravy
Two Years Ago: Pork Paillards
I've done pizza with chicken, ground beef, pepperoni, chorizo and shrimp, so I thought it was time to do one with a little steak. Ok, ok, in all honesty, I was trying to figure out what to do with a small 5oz steak I had in the freezer, when I stumbled upon this recipe from Ree, The Pioneer Woman. Oh, her pizza looks so much more photographically (I hope that's a word) perfect than mine.... but I can guarantee mine tasted just as good... if not better!
Steakhouse Pizza
Adapted from The Pioneer Woman
Printable Recipe
Ingredients:
1 5-6oz steak
salt and pepper
1 Tablespoon steak sauce
1 cup pizza sauce
1 teaspoon balsamic vinegar
1/2 teaspoon Worcestershire sauce
1 Tablespoon unsalted butter
1 teaspoon balsamic vinegar
1/2 sweet onion, chopped
1 jalapeno, sliced (remove seeds for less heat)
10-12 oz ball of pizza dough
8 oz fresh mozzarella cheese, thinly sliced
Directions:
Preheat grill to 400 degrees. Clean and oil grill grates. Season the steak with salt and pepper and brush with steak sauce. Place steak directly over the fire and grill for 4-5 minutes per side. You want the steak to still be rare to medium rare - you do not want to over cook it... remember it will cook more once it's on the pizza. Remove and allow to rest while you get everything else ready. Once ready, thinly slice the steak against the grain.
In a measuring cup or small bowl, mix together the pizza sauce, 1 teaspoon balsamic and the Worcestershire sauce. Cover and set aside.
In a skillet, over medium low heat, add the butter and 1 teaspoon balsamic vinegar. When butter has melted, add the onions and slowly caramelize. This will take about 20 minutes. Add the jalapeno and saute for 3-4 minutes or until the jalapeno has softened. Remove from heat.
Stretch pizza dough to desired size and shape. I place mine on a piece of aluminum foil sprayed with cooking oil, so it makes easy going once it's on the grill. Place on grill that is at about 350 degrees F and let one side of the dough become slightly golden brown (about 3 minutes). Remove from grill and flip the dough over. Spread the sauce over the cooked side of the dough. Top with thinly sliced steak and the onion/jalapeno mixture. Place the slices of mozzarella on top and place back on the grill for about 3-4 minutes. Move to indirect heat and continue to grill until the cheese has melted. Remove from grill and drizzle with more steak sauce if desired. Serve and enjoy!
One Year Ago: Smoked Pepper Tilapia
Two Years Ago: Grilled Parmesan Corn on the Cob
This Turkish inspired dish is not only packed full of flavor, but is so very simple, you will probably want to make it weekly!
And, because you know I couldn't resist - I paired this with a red pepper aioli that ... well... that will probably find it's way to your table weekly too!
Grilled Chicken with Spiced Red Pepper Paste
Adapted from Food and Wine
- Serves 2 -
Printable Recipe
Ingredients:
2 roasted red peppers, roughly chopped
2 jalapenos, stems remove and quartered (remove seeds for less heat)
1 garlic clove, halved
1 Tablespoon white wine vinegar
1/2 teaspoon kosher salt
1/4 teaspoon black pepper
1/2 teaspoon cumin
1 Tablespoon olive oil
2 boneless, skinless chicken breasts
For the aioli -
1/4 cup mayonnaise
2 teaspoons champagne vinegar
2 Tablespoons roasted red pepper, finely chopped
1/8 teaspoon garlic powder
1/4 teaspoon salt
1/4 teaspoon red pepper flakes
Directions:
In a food processor, add the ingredients except the chicken. Pulse until a loose paste forms. Place chicken in a shallow dish or resealable bag and pour the mixture over the chicken. Cover or seal and place in refrigerator for at least 2 hours.
For the aioli - mix all ingredients together in a small bowl until well combined. Cover and refrigerate until ready to use.
Preheat grill to 375 degrees F. Clean and oil grill grates. Remove chicken from dish or bag and discard the marinade. Place directly over the fire and grill for 8 minutes per side or until the chicken has reached an internal temperature of 165 degrees F. Remove from grill and allow to rest for 3-5 minutes before serving. Serve with aioli. Enjoy!
One Year Ago: Spice Rubbed Ribs with Chipotle-Honey Glaze
Two Years Ago: Grilled Chicken with Yogurt, Hot Pepper and Garlic
I am EXTREMELY excited about today's post. Today, Chris will be schooling us on AUTHENTIC jambalaya! Now this is not my Chris.. nope, this is my Chris' brother-in-law Chris. You might remember me telling you of the scolding I received when I posted a recipe for Creole Shrimp Pasta - it was not authentic Creole cooking. Ok, I knew it wasn't completely authentic, but whatever. The great thing about it.. I convinced Chris to do a guest post so that you all could see what REAL Creole cooking was all about it. And trust me, this a good read, I laughed out loud a few times when I read it! So, without further ado, please welcome Chris.
------------------------------------------------------------------------
This recipe is for a one pot chicken and sausage jambalaya. I am using a 3 gallon cast iron pot. This recipe serves about 12-15 people. As any good coonass knows, there is no real "recipe" for the signature jambalaya. I've summarized the best I can!
Ingredients
2 lbs. smoked sausage (I used Savoie's brand, but Richards is better. If you can't find authentic Louisiana smoked sausage, go to www.cajungrocer.com. It is essential to have good smoked sausage - I can't find it in Pittsburgh. Only choices are Cajun Grocer or invite my dad to come visit and bring a carry-on bag of frozen sausage - your choice!)
2 lbs boneless chicken - thighs are best but I used breasts here
One bunch of celery chopped
Quite a few white onions chopped
A bell pepper or two - red or green or both. I used red.
Tony Chachere's seasoning to taste
Tabasco Sauce
Salt
3 splashes Worcestershire sauce
8 cups of water
4 cups of uncooked rice - Uncle Ben's Long Grain White Rice ONLY!!!!
At least a case of cold beer - preferably on ice
White bread - preferably Bunny bread
1/4 cup vegetable oil
Directions:
After having your sous chef (or beautiful wife Rebecca) chop all onions, bell peppers, celery and sausage, you are ready to begin. Fire up the stove, put the cast iron pot on the stove. Grab a beer. Add about 1/4 cup vegetable oil. Once pot gets hot, add sliced sausage.
When sausage gets sizzling good, should be about time for another beer. Grab one. Stir sausage until it begins to render the fat.
After sausage gets nice and rendered, add chicken. Do not slice, chunk or cut chicken. Throw chicken in full pieces. As they cook, they will fall apart perfectly. Just throw them on top of the sausage and season with Tony's.
Next, ..............
Alternate between stirring the sausage/chicken mixture and taking swigs of beer. I usually start poking at the chicken to cut it up. If it's thighs, they begin to fall apart. Breasts are not as easy. I actually pulled these out right before they were done and used 2 forks to shred the chicken.
Continue to stir occasionally until sausage gets nice and brown. Grab another beer because it gets tough after this! Once sausage is nice and browned and chicken is done, add all onions, celery and bell pepper to the mix. Add about 1/3 of a small bottle of Tabasco sauce, Tony's seasoning and the Worcestershire sauce.
Stir occasionally in order to alternate the meat to the top and vegetables to the bottom. Probably time for another cold one after all this work. Stir every few minutes to keep it from sticking. **Tip - If meat begins to stick, add a small cup of water, it will immediately boil and allow you to release the stuck meat.**
This is at least a 2-3 beer job as it takes a while for everything to marry. I normally have the stove on medium heat for this. Below is the sequence of events:
Now we are ready to add the water and rice. Add the 8 cups of water and stir. Once this comes to a boil, stir again and then take a taste of the water. The water should be a little saltier and spicier than you like because the rice will soak up. Once you have the water right, slowly add the rice while stirring. Let this mixture come to a boil - this is the trick to taking the starchiness out of the rice.
Once the rice starts to boil, turn the fire down to low, then the hardest part of all for me - leave it alone!!!!! This is the point that you rehydrate yourself. Do NOT open the lid for 15 minutes, DO NOT DO IT!!!!!!!!!
This time is for.....
 After 15 minutes, go open the lid, turn the fire off and fold from the bottom a couple of times. Do not stir it, simply fold about 2 times. It should look like this.
Almost ready, but not quite. Turn the fire completely off, cover and walk away. After 30 minutes (or 3 beers, whichever comes first) go open the lid and you're ready to serve. A plate of jambalaya, two pieces of white bread and two Abita Purple Haze beers, you can't go wrong! Enjoy!
P.S. This recipe makes a lot, so let your inner southern hospitality out and share with your neighbors! Or, if you're like me and are a jerk, this makes the best leftovers ever!
P.S.S. GEAUX TIGERS!!!!!!!!!!!!!!!!!!!!
One Year Ago: Hoisin Peanut Butter Grilled Chicken
Two Years Ago: Spicy Beef Stir Fry
After 15 minutes, go open the lid, turn the fire off and fold from the bottom a couple of times. Do not stir it, simply fold about 2 times. It should look like this.
Almost ready, but not quite. Turn the fire completely off, cover and walk away. After 30 minutes (or 3 beers, whichever comes first) go open the lid and you're ready to serve. A plate of jambalaya, two pieces of white bread and two Abita Purple Haze beers, you can't go wrong! Enjoy!
P.S. This recipe makes a lot, so let your inner southern hospitality out and share with your neighbors! Or, if you're like me and are a jerk, this makes the best leftovers ever!
P.S.S. GEAUX TIGERS!!!!!!!!!!!!!!!!!!!!
One Year Ago: Hoisin Peanut Butter Grilled Chicken
Two Years Ago: Spicy Beef Stir Fry
Deliciously simple grilled shrimp with a spicy jalapeno sauce... how can you go wrong? This is a perfect summer dish - quick and very fresh. And hey, you don't like shrimp? Grill up a piece of chicken and pour this sauce over it...you'll be happy you did :)
Grilled Shrimp with Jalapeno Dressing
Adapted from Cook's Country
Printable Recipe
Ingredients:
1 lbs extra large shrimp, peeled, deveined
1 Tablespoon olive oil
1 Tablespoon lemon juice
1/4 teaspoon cayenne pepper
1/4 teaspoon salt
2 jalapenos, roughly chopped
2 Tablespoons cilantro leaves
1 teaspoon lemon zest
1 Tablespoon lemon juice
5 Tablespoons olive oil
Directions:
Place shrimp on a large bowl. Drizzle with 1 tablespoon olive oil, 1 tablespoon lemon juice, cayenne, and salt. Toss to coat. Cover and refrigerate for 1-2 hours.
Meanwhile, place the jalapenos, cilantro, lemon zest and juice in a food processor or blender. Pulse until pureed. With the machine running, slowly add the olive oil until all incorporated. Pour into a bowl, cover and set aside.
Preheat grill to 350 degrees F. To make things easy, I used a non-stick veggie/fish try that is made for the grill. If you do not have one, just thread the shrimp on metal or wooden skewers - if using wooden, make sure to soak them in water for at least 30 minutes before using. Place the shrimp over the fire and grill about 5-8 minutes, turning once, or until the shrimp are a lovely pink and heated through. Remove from grill, serve with jalapeno dressing, and enjoy!
One Year Ago: Grilled Tilapia with Mustard Chive Sauce
Two Years Ago: Sweet and Spicy Tilapia
Just the other day I was complaining about the excessive heat we have been experiencing. Had I just waiting a few more days, I would have actually not had a thing to complain about. This weekend was so lovely - spotted with thunderstorms and cooler temperatures (at one point on Saturday night I saw it was 75 degrees!!!) - I feel sort of bad about spewing my displeasure about how miserable it has been. But only sort of.. it's July, I live in the desert, I have lived here for enough years now to know to enjoy it while you can...the break doesn't last :)
Well, enough about the weather, let's talk food! I love it when one ingredient in a dish has enough flavor in it to carry the entire dish. No extra spices, no extra ingredients... just everything in it's finest, purest form. That is what a good chorizo can bring to any dish!
Chorizo and Shrimp Pasta
Created by Jenn's Food Journey
Printable Recipe
Ingredients:
10-12oz penne pasta
1/2 lbs ground Mexican chorizo
12 medium raw shrimp, peeled, deveined and tails removed
1/4 cup roasted red peppers, chopped
20 cherubs or cherry tomatoes, halved
2 oz goat cheese
fresh basil leaves (optional)
Directions:
Cook pasta according to package directions. Drain, reserving 1/2 cup of the pasta water; set aside.
In a skillet over medium heat, add the chorizo. Cook for 10 minutes, stirring occasionally. Add the shrimp and roasted red peppers and cook another 3 minutes. Stir in the tomatoes and cook another 2-3 minutes, or until the shrimp is pink and cooked through. Remove from heat and stir in the goat cheese until it has melted. Pour in the cooked pasta and toss to combine. Stir in reserved pasta water if needed to thin everything out. Serve immediately and enjoy!
One Year Ago: Grilled Pineapple Pound Cake Delight
Two Years Ago: Spaghetti with Hot Italian Sausage
If you've followed my blog for a while, you know of my friend Ruben and the amazing chorizo that he brings me from time to time. Last time he ventured out, he brought me back 5 pounds of this red gold - I now have 2 pounds left - well, one pound now that I've made this (ok, I am only using 1/2 a pound here, so come back tomorrow and see what I do with the other 1/2). THAT, my friends, is a show of pure self control!! Trust me, I could have easily used all 5 pounds within the first week or two of receiving it - but I wanted this to last - it's just that good.
ANYWAY, so it's been a while since I've made anything with Chorizo - last week I was going through our freezer when I saw those last two pounds just staring at me. It WANTED to be used, I swear, so how could I deny it what it wanted, right???
It's also been a while since I've made a pizza - guess it was just meant to be.
Chicken and Chorizo Grilled Pizza
Created by Jenn's Food Journey
Printable Recipe
Ingredients:
1/2 lbs ground Mexican chorizo
1 boneless, skinless chicken breast, cut into bite size pieces
1 jalapeno, sliced (seeds removed if you wish)
1/2 red pepper, chopped
fresh ball of pizza dough (10-12 inch)
olive oil
salt and pepper
1 cup pizza sauce
2 cups shredded jalapeno pepper jack cheese
Directions:
In a skillet, over medium heat, add the chorizo. Allow to cook for 8 minutes, stirring occasionally. Add the chicken and cook another 5-8 minutes or until the chicken is no longer pink in the middle. Add the jalapeno and red pepper and cook another 3 minutes. Remove from heat and allow to cool.
Preheat grill to 400 degrees F. Stretch dough and place on a piece of aluminum foil that has been sprayed with non-stick cooking spray. Brush both sides lightly with olive oil if desired and season with salt and pepper. Transfer to grill (I leave my dough on the aluminum foil, makes it easier to handle) over direct heat and grill for 3-4 minutes or until the bottom is a light golden brown. Remove from grill using a baking sheet. Flip dough over and cover with pizza sauce, the chorizo and chicken mixture, and finally top with the shredded cheese. Place back on grill for 2-3 minutes over direct heat and then move to indirect heat until the cheese has melted, another 3-5 minutes. Carefully remove from grill and allow to cool a few minutes. Slice and serve. Enjoy!
One Year Ago: Mediterranean Steaks
Two Years Ago: Not Quite Heinz 57 Marinade for Steaks
It's been hot, hot, hot here... did I mention it's been hot? Now, I understand that I live in the desert, so it's supposed to be hot and technically, I would not mind 112 degrees day in and day out if it would just cool down at night. It does not do that here this time of year. I think the lowest it's been over the last few days has been about 86 degrees. During the week I get up at 4:30 and run. Every morning I open the back door to head outside HOPING that there will be some sort of coolness in the air - I am disappointed every morning. Oh well, this happens every year and you'd think I'd be used to it... but alas, I am not and the sad thing.. it's only July - we have a long way to go before we get any sort of real cool down.
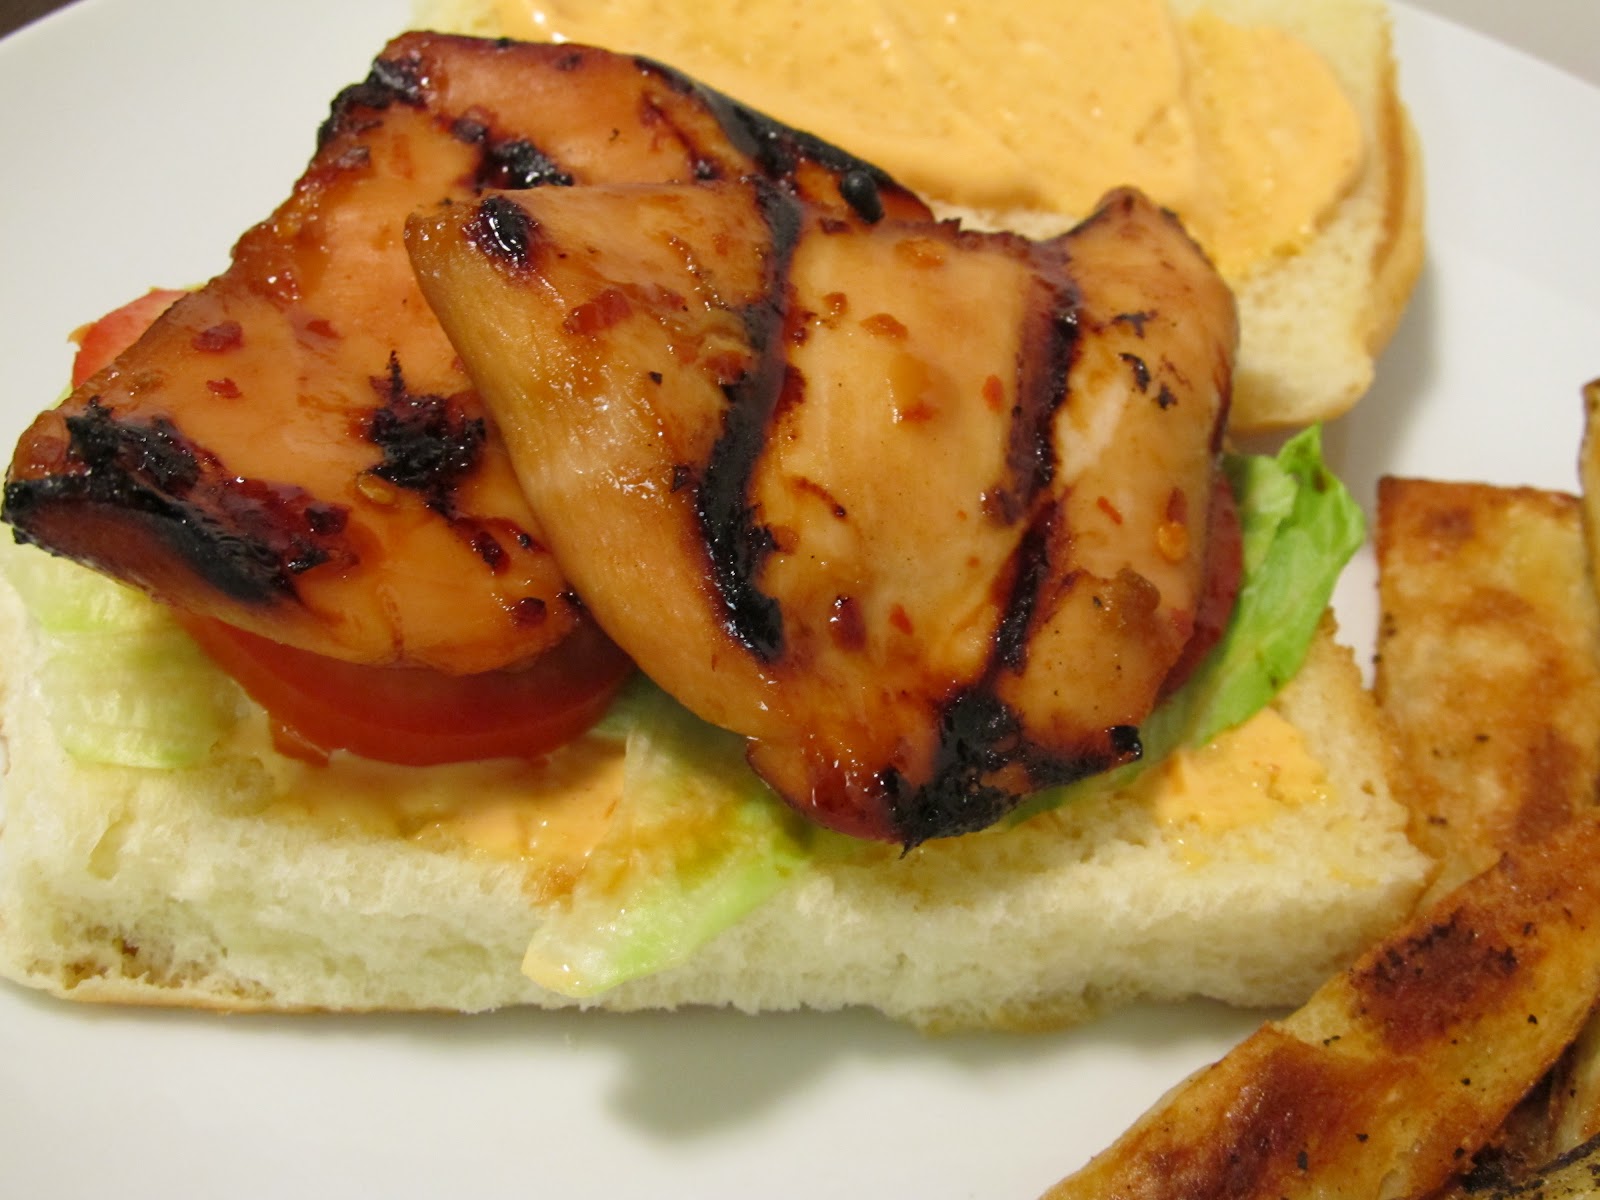
Hence why I don't use my oven this time of year. People say "how can you stand by your grill when it's that hot?" Well, I'd rather be hot outside where it's already hot and be able to go inside my cool house, then get my kitchen heated up and have to worry about the A/C working extra hard to cool down the house. Ok, ok, there is the fact that I LOVE to grill too. I'd rather grill than bake any day! And what better to grill then chicken sliders? This is a very simple recipe and can be jazzed up however you see fit - just don't forget the Sriracha mayo - it's da bomb!!!
Teriyaki Chicken Sliders with Sriracha Mayo
Created by Jenn's Food Journey
Printable Recipe
Ingredients:
4 thin cut chicken breasts, or 4 breasts pounded flat - about 1/4inch thick
1/3 cup teriyaki sauce (homemade or store bought-I used store bought)
1 Tablespoon honey
1/2 teaspoon red pepper flakes
King's Hawaiian Sweet mini sub rolls
Lettuce
Sliced tomato
For the Sriracha Mayo -
3 Tablespoon mayonnaise
2 teaspoons Sriracha
1/4 teaspoon soy sauce
Directions:
Place the chicken in a resealable plastic bag. In a small bowl or measuring cup, mix together the teriyaki sauce, honey, and red pepper flakes until well combined. Pour mixture over chicken, seal bag, and place in refrigerator for 2-4 hours.
Meanwhile, make the mayo by mixing together the mayonnaise, Sriracha and soy sauce until well combined. Cover and refrigerate until ready to use.
Preheat grill to 350 degrees F. Clean and oil grill grates. Remove the chicken from the bag and discard the marinade. Place the chicken directly over the fire and grill 5-8 minutes per side or until the chicken reaches an internal temperature of 165 degrees F. Remove and allow to rest for 5 minutes.
To build the slide - slather both cut sides of the sub roll with the Sriracha mayo. Top with chicken, lettuce, and tomato. Serve and Enjoy!
One Year Ago: Chimichurri Shrimp and Rice Skillet
Two Years Ago: Sunny Side Orzo
Imagine my surprise when I clicked on my bookmark for The Food Floozie and found myself gifted with a little award. I just adore Mary and her blog - she is fearless in the kitchen, she is humorous and witty, and she truly has one of the biggest hearts out on the blogosphere. Please make sure to stop by and say hello to her - if you have never visited her site, you are in for a treat.
Here's what comes with the award:
1. Post the rules on your blog.
2. Name 5 of your most fabulous moments, either in real life or in the blogosphere.
3. Name 5 things you love.
4. Name 5 things you hate.
5. Pass the ribbon on to 5 other bloggers.
So, with the the rules posted above, I'll start with -
Five of my most fabulous moments:
1. In 2005 I made my first trip to Burning Man. I had heard so many things about it, but to actually be there and experience everything - well, I've experienced nothing else like it. That year, I was spinning fire with a group of friends and we had been selected to spin in the great circle on the night the man burned. THIS was a huge honor as a fire spinner. What did it mean for me? It meant I got to spin in front of over 30,000 people! (yep, you read that right 30K) I was so nervous, I was fighting with the guy I was seeing at the time, we had been camping in the middle of nowhere for 5 days already, I was tired, I was hot.. I mean, it was not a moment I would want to relive. BUT, as soon as we lit our poi and we started spinning, everything else just went away. It was me, spinning fire in front of thousands and thousands of people. It was pretty fabulous!
2. For those of you that have spent any time on my blog, you will know I love to grill. I don't think of myself as a grill-master, I don't think of myself as an expert - far from both. But I love it, and I think that is what is really important... if you have that passion, you can become all those things. As a female, I'm quite discouraged when I hear woman say they don't know how to grill or they don't like to grill or their husband won't let them grill - you see, that's poppycock! Ladies, grillin' ain't just for the boys anymore. There is one woman in particular that I think is a Grilling Goddess - Robyn the Grill Grrrl - and one of my most fabulous moments on this blog was when she commented on a few of my posts! I can't tell you how fabulous that made me feel... like your long time idol just popping in to say hello. It was pretty fabulous :)
3. I am not one to enter contests - at least not many - and I always go in with the attitude of "well, I probably won't win, but here goes". Maybe that isn't the way to go into it, but I'm not as confident in my food or my abilities as I would like to be. I will get there some day... I'm getting better...but just not right now. That's ok. On occasion I will enter a contest, and sometimes I don't do too bad. One really fabulous moment in my life was when I made it thru to the final round in a recipe contest the Cooking Channel was hosting. I didn't win, but that was ok, I got further in the contest than I thought I would, I did my first video entry ever, and I got noticed, even just for a moment! That was pretty fabulous.
4. Another great moment in my blogging history would be when a Jenn's Food Journey creation caught the eye of the Huffington Post. To have a representative contact me and ask for permission to use my recipe and photos on their site...linking it all back to me... how could I say no? That was the firs time one of my recipes got noticed like that. It was pretty fabulous.
5. The day Chris and I moved in together. I know that might sound corny to people, but it's true. When Chris and I first moved in together over 4 years ago, it was a fabulous day. I knew this was the man I wanted to be with, I knew he wanted to be with me... We were taking the next step... my life was finally starting to come together in all aspects. It was a fabulous moment in my life and will forever stay that way :)
Five things I love:
1. My family - to me, family is one of the most important things in life. I am fortunate to have an amazing family that is full of love and support. Oh, sure, we've had our differences, but they are mine and I love them all so very much!
2. Chris - the love of my life. He too is full of love and support for me and without him, my life would be incomplete.
3. Our Cats - despite the attacks from Lexi Luthor, despite the 3am wake up calls by Savage, despite the "pay attention to me" meowing the entire time I'm cooking from Bailey - they are my children and I wouldn't give them up for the world.
4. Food - what's not to love?? Specifically though, Mac & Cheese, Sushi, and my mom's tacos!
5. Fire - without it there would have never been the invention of the hamburger! Not only do I cook with it, but I spin it too... how's that for cool?
Five things I hate:
1. TRAFFIC!!!! - enough said
2. People who refuse to open their minds to others ideas and opinions.
3. Lima beans - (Sorry Stephen!!!)
4. Stubbing your toe in the middle of the night when you are half asleep.
5. People who feel they are entitled to everything.
Five Fabulous Bloggers:
Five fabulous ladies I would love to sit down with and talk about cooking all day! Five fabulous ladies who's dinner table I would love to sit at -
1. Mary of Barefeet in the Kitchen
2. Mary of Inside a British Mum's Kitchen
3. Pam of For the Love of Cooking
4. Lea Ann of Cooking on the Ranch
5. Angie of Angie's Recipes
By the way, none of you are obligated to do anything with this award - sometimes it's hard to find the time to put posts like this together - this is supposed to be fun, not work!! And of course, a GREAT BIG THANKS again to Mary for honoring me with this award!
One Year Ago: Chocolate Peanut Butter Cup Ice Cream
Two Years Ago: Strawberry Cheesecake Ice Cream
I think by now, most of you know my love for Asian flavors. I use a lot of the same ingredients throughout my many recipes on this site. Some say repetition can be boring - I am not one of those people. I figure as long as it doesn't taste exactly like what I just made four days ago, everything is ok :) As always, if you really want to make this dish and you don't have a grill - don't worry, bake at 400 degrees F for 12-14 minutes... so no excuse - well... unless you don't like fish, then use this on chicken or pork... SEE, truly no excuses!
Asian Grilled Tilapia
Created by Jenn's Food Journey
- Serves 2 -
Printable Recipe
Ingredients:
1 Tablespoon sweet chili sauce
1 Tablespoon soy sauce
1 Tablespoon mirin
1 Tablespoon chili paste
drop or two of sesame oil
2 tilapia fillets
Directions:
Mix the sweet chili, soy, mirin, chili paste and sesame oil together until well combined.
Preheat grill to 350 degrees F. Tear two squares of aluminum foil large enough to form a packet around the fish. Spray with non-stick cooking spray. Place the fish in the middle of each piece of foil and spoon the chili mixture evenly over each piece of fish. Bring together opposite sides of the foil, fold together to seal. No fold the ends to seal into a packet. Place packet directly over the fire and grill for 12-14 minutes, rotating the packet once. Carefully remove from grill and allow to cool for 5 minutes. Carefully open packet and remove fish. Enjoy!
One Year Ago: Mango Chipotle BBQ Chicken
Two Years Ago: Pulled Pork Quesadillas
I'm almost sort of embarrassed that I'm posting this recipe. I mean it's probably the easiest thing I have made in the last 2 years. So easy that I feel guilty for posting it - but in my defense, sometimes, as a blogger, you need fillers. You NEED those posts that let people know you don't always have to do so much to have a great home cooked meal!
Piña Colada Grilled Chicken
Created by Jenn's Food Journey
- Serves 2 -
Printable Recipe
Ingredients:
2 boneless, skinless chicken breasts
salt and pepper
1/3 cup Piña Colada mix (alcohol included)
For the Lime Aioli -
1/4 cup mayonnaise
1 Tablespoon freshly squeezed lime juice
1/4 teaspoon garlic powder
1/4 teaspoon cayenne pepper
1/8 teaspoon salt
1/8 teaspoon white pepper
Directions:
Season the chicken with salt and pepper and place in a resealable plastic bag. Pour the piña colada mix over the chicken, seal, and place in refrigerator for 8 hours (I threw this together before I left for work-it marinated all day).
For the aioli - mix together all ingredients until well combined. Cover and refrigerate until ready to use.
Preheat grill to 375 degrees F. Clean and oil grill grates. Remove chicken from bag and place directly over the fire. Grill 8-10 minutes per side or until the chicken reaches an internal temperature of 165 degrees F. Remove and allow to rest for 5 minutes. Serve with aioli and enjoy!
One Year Ago: Shrimp Lettuce Wraps with Serrano Mint Sauce
Two Years Ago: Pulled Pork Sandwiches
Finger - Licking - Good... That is really all that needs to be said about this dish. There was nothing about this dish that did not make me go "mmmmmmmmmmmmmm" with delight! I think I may have even done a little dance. Then again, how can you go wrong with perfectly spiced and grilled shrimp dipped in a delicious little sauce? Yes, the remoulade was outstanding, but honestly, and I know most of you will be surprised by me saying this... the shrimp really was the star. (ok, ok, the sauce was just as fantastic!!!!!)
Cajun Spiced Grilled Shrimp with Remoulade
Adapted from Cooking Light
Printable Recipe
Ingredients:
1 teaspoon sweet paprika
1/2 teaspoon salt
1/2 teaspoon white pepper
1/2 teaspoon black pepper
1/4 teaspoon onion powder
1/4 teaspoon garlic powder
1/4 teaspoon dried thyme
1/4 teaspoon dried oregano
1/4 teaspoon cayenne pepper
1 Tablespoon olive oil
1 pound large shrimp, peeled and deveined
For the Remoulade -
1/4 cup mayonnaise
1 Tablespoon fresh chopped chives
1 teaspoon ketchup
1/2 teaspoon fresh chopped parsley
1/2 Tablespoon lemon juice
1/2 Tablespoon Creole style mustard
1/2 teaspoon prepared horseradish
1/2 teaspoon Worcestershire sauce
1 garlic clove, finely minced
Directions:
In a small bowl, mix together the first 9 ingredients. Place shrimp in a large bowl and drizzle with olive oil. Pour spice mixture over and toss to coat. Cover and refrigerate for 1 hour.
Meanwhile, combine all ingredients for the remoulade in a bowl. Mix until well combined. Cover and refrigerate until ready to use.
Preheat grill to 375 degrees F. Tear a large piece of aluminum foil and spray with non-stick cooking spray. Pour shrimp into the center of the foil. Bring the opposite ends of the foil together and fold twice to seal; fold in the remaining sides to seal. Place directly over the fire and grill 8 minutes, rotating the packet once during the cooking time. Carefully remove from the grill and foil packet - serve with remoulade and enjoy!
One Year Ago: Asian Meatball Subs with Hoisin Mayonnaise
Two Years Ago: The Obsessive Chef's Homemade Tatar Tots
I would have loved to have shown you a shot of the inside of this piece of pork. I would have loved to have shown you the goat cheese and roasted red pepper filling that I stuffed so diligently inside... but alas, most of the filling came out while grilling and when I cut into it, the layer of filling was too pathetic to photograph. But at least the outside looks absolutely beautiful, doesn't it??? :)
Hope everyone had a great 4th of July. If you are still on vacation - hope that you are still enjoying it! If you had to go back to work today like I did... well, at least we only have two days until the weekend, right?
Grilled Pork Chops Stuffed with Goat Cheese and Roasted Red Peppers
Created by Jenn's Food Journey
- Serves 2 -
Printable Recipe
Ingredients:
2 thick cut pork loin chops (at least 1" thick)
4 cups water
1 Tablespoon salt
1 Tablespoon granulated sugar
1 teaspoon minced garlic
1 teaspoon red pepper flakes
Olive oil
1/2 teaspoon black pepper
1/2 teaspoon paprika
For the stuffing -
2 Tablespoons goat cheese
1 1/2 Tablespoons finely chopped roasted red peppers
1/8 teaspoon garlic salt
1/8 teaspoon black pepper
Directions:
In a large measuring cup, add the water, salt, sugar, garlic and red pepper flakes - stir until combined. Place the pork in a resealable bag and pour the brine over the pork. Seal the bag and place in refrigerator for 2 hours. Remove from brine and thoroughly rinse the pork with cool water. Using a sharp knife, make a pocket in the pork chop. Start by pushing the knife into the side of the chop and carving out a square space inside the chop that has a small opening. The goal here is to make a space inside the chop with about a 1/4 inch point of connection on three sides of the chop. This makes room for the stuffing, but holds it all inside the chop where you want it (or at least that's what's suppose to happen!). Pat the pork dry and drizzle with olive oil and season with pepper and paprika; set aside.
Mix together all the ingredients for the stuffing. Stuff half of the mixture into each pork chop - seal with toothpicks if you wish.
Preheat grill to 375 degrees F. Clean and oil grill grates. Place the pork over the fire and grill about 8-10 minutes per side or until the pork reaches an internal temperature of 145 degrees F. Remove and allow to rest for 5 minutes. Enjoy!
One Year Ago: Grilled Chicken with Peach-Thyme Mustard
Two Years Ago: Simple Herb Marinated New York Steaks