Search This Blog

Friday, April 30, 2010

Hudson's Baked (or Grilled) Fish with Dill Sauce

 
Anytime I use dill in a dish, I'm always fondly reminded of my childhood.  When I was a kid, my whole family would get together on Sunday's at my grandma's for lunch.  Whole family meaning my mom, dad, sis, aunts, uncles, cousins, grandmas.  I have so many great memories from those times.  One in particular always stands out (and to my dear cousin Cortney, I'm sorry, but it's time to bring this up!!!) ... rolls with grass.  Yes, that's right, rolls with grass.  My mom use to make these rolls and she'd spread butter with dill on them and then bake them.  My younger cousin, Cortney, always referred to them as rolls with grass.. and you know, dill really does look a bit like grass! :)  ****I was just reminded by my mom that she actually called them grass rolls...sorry Cort for getting it wrong!!***


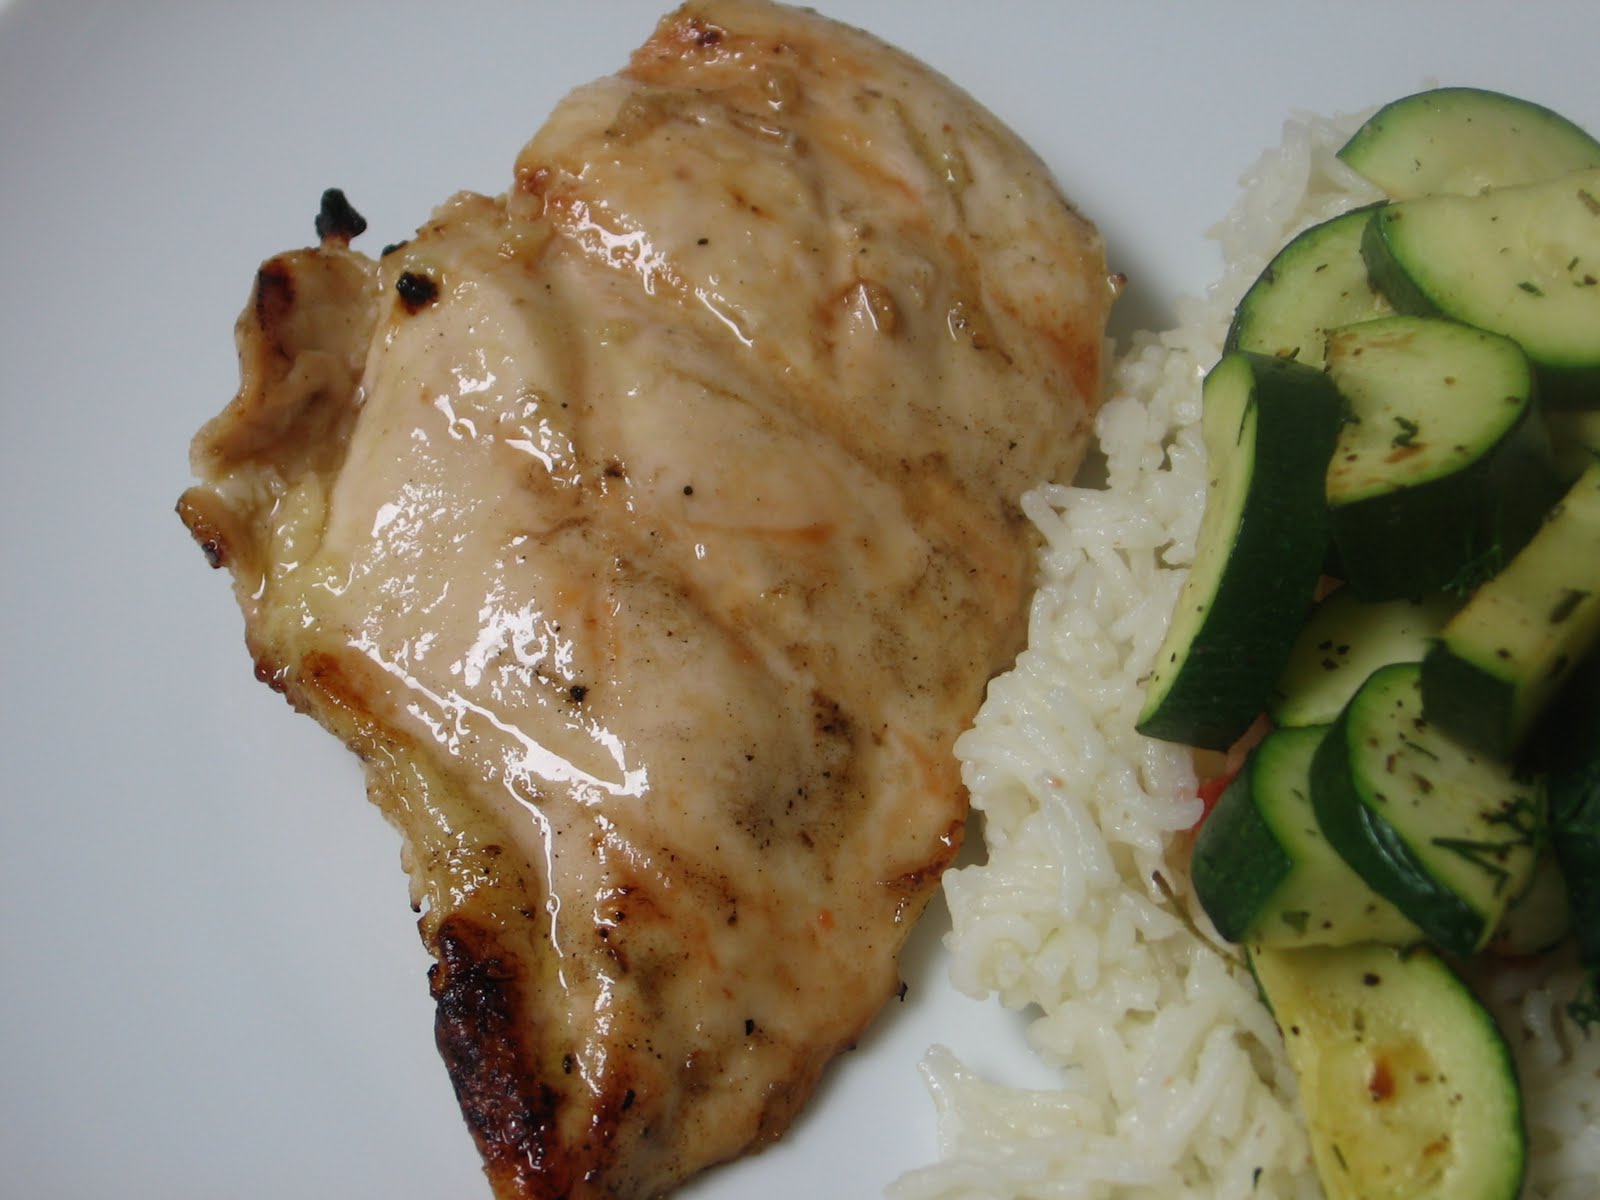
Anyway, this was a nice fresh idea.  It actually called for baking, but I decided to try doing it on the grill.  I put them in foil packets and threw them on the grill that way.  It worked out perfectly!  And I didn't have to heat up the kitchen!!  YAY!  Of course, there was sauce...mmmmmm...sauce!!  And just a nice simple sauce that uses fresh dill...and THAT is why I told the story of the grass rolls!

Hudson's Baked (or Grilled) Fish with Dill Sauce
Adapted from Allrecipes.com 
Ingredients:
4 (4oz) tilapia fillets (again, you can use any white fish for this)
1 Tablespoon Creole seasoning (you can make your own, check out Emeril's recipe)
1 lemon, sliced
For the sauce:
2 Tablespoons mayonnaise
2 Tablespoons sour cream
1/8 teaspoon garlic powder
2 teaspoons fresh lemon juice
1-2 Tablespoons chopped fresh dill

Directions:
In a small bowl, mix together all the ingredients for the sauce.  Cover and refrigerate until ready to use.

To Grill:
Preheat grill to 400 degrees.  Tear off squares of aluminum foil and spray with non-stick cooking spray.  Season both sides of the fillets with the Creole seasoning.  Place one fillet on each square of foil.  Top each fillet with 1-2 slices of lemon (depends on how thick or thin you sliced the lemon) and seal into a packet.  Place on grill and cook for 12-14 minutes.

To Bake:
Preheat the oven to 400 degrees.  Prepare a baking dish with non-stick cooking spray.  Season both sides of the fish with the Creole seasoning and lay in a single layer in the baking dish.  Place a layer of lemon slices over each fillet.  Bake, uncovered, for 12-15 minutes.

Serve the sauce along side the fish....and Enjoy!!

Thursday, April 29, 2010

Rigatoni with Sping Herbs and Tuna

 
Let me just say....THIS DISH WAS FANTASTIC!  It was simple and light and fresh.  Everything I love in a springtime pasta dish!  Spring has definitely sprung in this part of the country (ok.. summer has about sprung here, but still)!  When spring hits, my craving for heavy, comforting foods sort of subsides. But never fear, I never loose the craving for pasta, so I try to find nice light healthy dishes to make.  This was exactly one of those meals.  It had a wonderful fresh taste to it.  I used parsley, dill, and basil, but you could use any combination of herbs if you'd like.  If you are blessed to have an herb garden, use what you have on hand.  Again, if you weren't a tuna fan you could easily leave it out, or substitute cut up chicken breasts.  Whatever you do, just try it, I promise you will love it!

MMMMMMMMMMMMMMM....all gone!!!

Rigatoni with Spring Herbs & Tuna
Adapted from Martha Stewart
Ingredients:
1/2 pound dried rigatoni
1/2 cup roughly chopped mixed herbs  (I used parsley, dill, and basil)
2 tablespoons extra-virgin olive oil
1 tablespoon fresh lemon juice
Coarse salt
1/8 teaspoon freshly ground pepper

1 can tuna fish in oil, do not drain (I used solid light tuna in olive oil)
1/2 cup (1 ounce) grated Parmesan cheese


Directions:
Cook pasta in a large pot of salted water according to package directions. Drain pasta, then toss with oil, lemon juice, 1/4 teaspoon salt, the pepper.  Add the mixed herbs, tuna, and 1/4 cup Parmesan in a large serving bowl. Serve with remaining 1/4 cup cheese on the side.  Enjoy!

Wednesday, April 28, 2010

Murphy's Hot Hamburger

Have you ever seen a recipe post (with a picture of course) and said to yourself...Holy CRAP that looks GOOOOD!!!  Well, if not, you are missing out, because the true fun is seeing if you can duplicate the recipe that made you say that!  This was one of those recipes for me (my picture might not have the effect on you, but trust me..this is fantastic).  I saw it and my mouth instantly watered.  I knew, without a doubt that Chris would enjoy it, so there was no problem there.  It turned out to be just what I wanted.  It was just the type of meal you'd find in a small little hole in the wall dinner.  It was a down home, Midwest style meal and it was gone in 60 seconds.  LOL  Ok, ok.. it took us longer then that, but it sure did seem like it was over that quick.  The great thing about this recipe is, it's simple and takes no time at all.  Actually, the most time you put into is just waiting for the potatoes to cook.  Once you get the hamburger patties on the skillet it's about 10-20 minutes and it's ready for your plate.  Now, I don't know where Murphy's is or anything about it for that matter..but what I do know is they make (or made) this dish...and well.. now I also know that Murphy's RULES!!

By the way... I use Wondra flour in this...you can just use regular all purpose flour, but if you want something that is less likely to cause lumps.. you have got to invest in this....

(You won't be disappointed!!)

Murphy's Hot Hamburger
Adapted from Alisha, Tasty Kitchen.com
Ingredients:
1 pound Ground Beef (I used 80/20)
1 Tablespoon Minced Garlic
1 teaspoon Onion Powder
1 teaspoon Seasoned Salt 
2-3 Tablespoons Wondra flour (or all purpose flour)
1 - 14 Oz. Can Beef Broth OR 2 Cups Water With Beef Bouillon 
2-3 whole Large Potatoes
1 Tablespoon Oil, Or As Needed
Cayenne pepper
Salt And Pepper, to taste

Directions:
Preheat oven to 425 degrees. 

Slice potatoes into fries. Place on a large baking sheet. Pour about 1 tablespoon of oil over the fries and toss with fingers to coat evenly. Sprinkle fries with seasoning of choice. I use seasoned salt. Place in the oven. Bake for approximately 30-45 minutes or until golden and crispy.

In a mixing bowl, mix hamburger, garlic, seasoned salt, onion powder, and pepper. Mix well with hands. Form 4 large patties. Place in a large preheated skillet over medium heat, preferably one with deep sides. Brown burgers on each side until done. 

Remove burgers from the skillet and place on a plate covered in paper towels. Do not drain the grease. Add the flour a tablespoon at a time, stirring with a whisk. You have enough when the grease is all absorbed and the flour mixture gets thick and bubbly. Slowly add the broth a little at a time, whisking constantly. Bring to a simmer and allow to thicken.
To serve, place an ample amount of fries on the plate. Place a hamburger on top of the fries and cover it all amply in gravy. Enjoy!

Tuesday, April 27, 2010

Italian Baked Pork Chops

I knew this one was going to be a tasty meal when I heard Chris proclaim from the other room....Oh my god this is so GOOD!!!!  And he was absolutely right.  But you'll probably not be surprised by this statement.  This dish has all my favorite flavors.  Parmesan cheese, Dijon mustard, basil, oregano, parsley.....mmmmmmm......what more could an Italian (ok, part Italian) girl ask for?  I found this recipe in one of Sandra Lee's Semi-Homemade cookbooks.  When I bought the book, I was astonished at all the people who commented on it, saying that they didn't like it because she used too many store bought ingredients.  I laughed because, well, if they really truly knew anything about Sandra, they would have known that Sandra is all about taking certain store bought items and turning them into "semi" homemade meals.  Her thing is to make things easy and in a short amount of time and make it look like you spent hours in the kitchen.  Now, I'm not always fond of her recipes, I'd rather use fresher ingredients, but they give me ideas, and that is what I LOVE about them.  This one is actually straight from her book... and I didn't change a thing.

Italian Baked Pork Chops
Recipe courtesy of Sandra Lee, Semi-Homemade 2
Ingredients:
1 Tablespoon Dijon mustard
1 Tablespoon Extra Virgin Olive Oil
1/2 teaspoon Italian Seasoning
4 center cut Pork Chops
salt & pepper
1/2 cup shredded Parmesan cheese

Directions:
Preheat oven to 400 degrees.  Prepare a baking dish with non-stick cooking spray.

In a small bowl, whisk together Dijon, oil and Italian seasoning.  Season pork chops with salt and pepper.  Brush both sides with the mustard mixture.  Place in prepared baking dish.  Press Parmesan cheese on top of the pork.

Bake 12-14 minutes or until the pork is cooked through.  Enjoy!

Monday, April 26, 2010

Pass it On Week 3: Brava Steak

Once again, this recipe is not from Jamie Oliver, but I'm sure he would still be pleased.  This is all about getting more people to not only cook, but to cook with more fresh ingredients.  This recipe does just that!!  This one is actually from one of my favorite chefs, Rick Bayless.  I use to watch his show, Mexico-One Plate at a Time, all the time.  I loved it!  He was just so informative, it made his show fun to watch.  Just recently, I watched him take the winning seat on the TV show, Top Chef Masters.  He makes some amazing dishes using very fresh, very local ingredients.

So what is Brava anyway?  Well, in Spanish, Brava means rugged and wild.  And boy oh boy is this steak wild!!!  The puree that the steaks marinate in is made from garlic and serrano peppers. (I tried to get a picture of it, but to no avail).  If you are not a spicy food lover, this will be far too hot for you.  Never fear, you can use another level of pepper.  If you want it a bit less but still like the kick, use one jalapeno.  If you want it even less spicier then that, use 1/2 a pablano.  Even less, use an anaheim.  I think what I'm saying is, use the pepper that best suits your spice level.  I think if you find the right pepper, you will very much enjoy this steak.  Even with using 2 serrano peppers, it was spicy, but not unbearable.  It had a kick, but it didn't kick your butt.

So, go ahead...Pass It On!

Brava Steak
Recipe courtesy of Rick Bayless
Ingredients:
3 garlic cloves, unpeeled
2 serrano peppers (or pepper of your choice)
2 Tablespoons lime juice (1 lime)
2 Tablespoons extra virgin olive oil
1/2 teaspoon salt
4 chuck tender steaks (equaling 1lbs.) - or steak of your choice

Directions:
In a small ungreased skillet, roast the unpeeled garlic and peppers, over medium heat, turning occasionally, until both are soft blotchy brown/black in places, about 5-10 minutes.  Cool, then peel the garlic.  Place the garlic, along with the pepper, lime juice, oil, and the salt in a food processor.  Process until the mixture is as smoothly pureed as possible.  Place the steaks in a Ziploc bag and pour the puree over them.  Seal the bag and let the steaks marinate in the refrigerator for 1 hour.

On a preheated grill or grill pan, cook the steaks 10-20 minutes or until they are cooked to your liking, turning only once.  Let steaks rest a few minutes before cutting into them....then ENJOY!

Friday, April 23, 2010

Pasta with Zucchini, Tuna & Almonds

This could easily become my favorite pasta recipe.  I didn't know what to think about the whole tomato mixture that you throw together before you start, but I have to say.. it was the BEST part about the recipe.  It added this amazing flavor to the pasta.  And the cherry tomatoes, well they just add that... you know that... that thing that makes a dish damn close to perfect...yea, that's what it was like!  If you aren't a tuna fan, you could make this with chicken or just leave the protein out all together.  Chris likes pasta more if it has a protein in it and since I crave pasta once a week (I can't help myself, it calls me), I try and make it so that he'll enjoy it just as much as I do!  In trying to continue to be as frugal as I can be, tuna is cheaper then chicken, so it worked out that it was all I had on hand too!


Pasta with Zucchini, Tuna & Almonds
Adapted from Cooking Light
Ingredients:
1 cup cherry tomatoes, quartered
1/2 teaspoon dried thyme
2 teaspoons lemon juice
1/2 teaspoon kosher salt
1/2 teaspoon black pepper
1/4 teaspoon sugar
5 teaspoons extra virgin olive oil
2-3 cups dried ziti pasta
1 (5 oz) can white albacore tuna, drained
2 cloves garlic, minced
1-2 cups zucchini, cut into rounds, then into quarters
1/4 cup fat-free, less sodium chicken broth
3 Tablespoons chopped almonds
3 Tablespoons chopped fresh parsley (or 1 Tbls dried)
Shredded Parmesan cheese

Directions:
Combine first 7 ingredients in a medium bowl. Add 2 teaspoons oil, tossing to coat.

Cook pasta according to package directions, omitting salt and fat. Drain well.

Heat a nonstick skillet over medium heat. Add the remaining 1 tablespoon oil to pan, swirling to coat. Add garlic to pan; sauté 30 seconds. Add zucchini; sauté 2 minutes or until crisp-tender. Add broth; bring to a simmer. Add almonds and tuna and remove from heat.  Pour over pasta and toss to coat.  Pour tomato mixture over pasta and toss once more to coat.  Enjoy! 

(Nutritional Facts - 1 serving = 1 1/2 cups: 344 calories; 12g fat; 58mg cholesterol; 45.5g carbohydrates; 14g protein; 5.3g fiber; 3.4mg iron)

Thursday, April 22, 2010

Tilapia Oreganata

Happy Earth Day everyone!  I didn't plan any special posts for the day...all I'm asking is that you be as green as possible today (and every day for that matter).  I'm at least sharing a nice fresh, sorta green recipe!!  :)

Oreganta, what a strange little word.  And let me tell you, it was not easy trying to find what exactly that word meant either.  I looked everywhere I knew where to look for an actual definition.  Finally, after chatting with my pal Stephen over at The Obsessive Chef about the word, he sends me an email with this:  "A classic Italian antipasti, the oreganata topping consists of breadcrumbs, garlic, and lots of fresh oregano. It's a savory and scrumptious way to enjoy clams on the half shell."  (Thanks Stephen!!)  The topping.. that's what I thought it was about, but believe me, this was not an easy answer to come up with!


So, now I know a little more about the dish and feel a lot better about sharing it with you too!  The fish was fantastic!  It's very light and fresh tasting....and don't forget healthy!!  I didn't get the greatest pictures of it...if you want to see what looks like when you take a your camera takes a great picture of it, check out  Aggie's Kitchen, her picture does it much better justice.

Tilapia Oreganata
Ingredients:
4 tilapia or other white fish fillets
2 Tablespoons olive oil
3/4 cup panko breadcrumbs (you can use regular breadcrumbs)
1/4 cup chopped parsley, loosely packed
3 Tablespoons lemon juice
2 garlic cloves, minced
1/4 teaspoon salt
1 teaspoon dried oregano (I did not have fresh..but please, use it if you have it)

Directions:
Preheat oven to 400 degrees F.  Spray a baking dish with non-stick cooking spray.

Combine all the ingredients except the fish in a bowl.  Place the fish in the baking dish and press an equal amount of the bread crumb mixture on top of each fillet.

Bake for 12-15 minutes or until the fish flakes easily with a fork.  Enjoy!

(By the way... I don't know where I actually found the original recipe that I have adapted here...so I'm sorry to whoever I took it from about 2 years ago, I wrote down the ingredients, I just didn't write down the source...my bad!)

Wednesday, April 21, 2010

Saucy Sirloin Steak

MMMMMMMMM.... the saucy girl in me couldn't wait to try this recipe!  I've said before, I am a sauce girl.  Most of the time, things might not NEED the sauce, but sometimes what a sauce adds to the meal is what makes the meal.  In this case.....OMG....the saucy steak was a true winner in our house.  It was tart, it was savory, it was DE-LIC-IOUS!!!  There really isn't much else to say.....


Saucy Sirloin Steak
Adapted from Cooking
Ingredients:
1 pound boneless sirloin steak, trimmed
1/2 cup red wine
1/4 teaspoon kosher salt
1/4 teaspoon garlic powder
1/4 teaspoon black pepper
1 teaspoon olive oil
2 garlic cloves, minced
1/4 cup beef broth
2 Tablespoons hoisin sauce
2 teaspoons Dijon mustard
1 1/2 teaspoons red wine vinegar

Directions:
Place the steaks in a Ziploc bag and pour the wine over it.  Marinate for 4 hours.

Remove steaks from the bag and discard the marinade.  In a small bowl, combine the salt, pepper, and garlic powder. Sprinkle the salt mixture over both sides of the steak.

Grill steaks on preheated grill for 12-25 minutes or until the steak is done to your liking.  Let rest for 5 minutes before cutting into them.

While steaks are resting, heat the olive oil in a small saucepan over medium heat. Add the garlic, and cook for 30 seconds, stirring constantly. Add the broth and the remaining ingredients. Bring to a boil; reduce heat, and simmer for 5 minutes or until thick, stirring with a whisk. Cut steak diagonally across the grain into thin slices, and serve with sauce.  Enjoy!

(Nutritional Information - 3oz steak & 3Tbls of sauce:  227 calories; 8.8g fat; 27g protein; 8.5g carbohydrates; 76mg cholesterol; 765mg sodium; 3.2mg iron)  

Tuesday, April 20, 2010

Beef Rigatoni in an Intensely Tomato-y Cream Sauce

The Meat and Potatoes Foodie, if you have not visited Alisa's site...now is THE time.  I don't know a ton about Alisa, but what I do know is she writes, she loves horses, she loves marinades as much as I do (YAY!), and she has some amazing looking pasta dish on her site. (ok, she's got just a ton of amazing looking dishes...pasta and beyond)!  MMMMMMMM....pasta!!!!  Did I mention this dish is....A-MAZE-ING!?!?  Chris couldn't stop talking about how good it was..and well, my mouth was too full to actually say anything, so I just shook my head and continued to devour what was on my plate.

Now, Alisa calls for transferring the rigatoni into the sauce and then tossing to coat.  I knew I was making more sauce then I was pasta (I didn't have a full pound), so I decided to just mix it once it got in the bowl.  Believe me, either way, this is a must try.  Ok, it might not be extremely healthy, but it's comforting, it's filling and absolutely delicious!

Beef Rigatoni in an Intensely Tomato-y Cream Sauce
Adapted (slightly) from The Meat and Potatoes Foodie 
Ingredients:
1 Tablespoon olive oil
1 Tablespoon butter
1/2 a sweet onion, diced
1/2 teaspoon kosher salt, divided
fresh ground black pepper
2-4 cloves of garlic, minced
1 lbs ground beef (I used 90% lean)
1/2 teaspoon red pepper flakes
1/2 cup chicken stock
4 oz. can tomato paste
1 (14oz) can diced tomatoes, drained slightly
2 oz cream cheese
1/2 teaspoon dried oregano
salt and pepper to taste
1 lb. rigatoni
Parmesan cheese

Directions:
Put a large pot (with lid on) of water on a burner over high heat for your pasta.

Meanwhile, add the butter and olive oil to a large dutch oven and put over low/medium heat. Let the butter melt, then add the onions, 1/4 teaspoon salt and some fresh cracked pepper giving a good stir. Cook for a couple of minutes, then stir in the garlic. Saute, stirring occasionally another 1-2 minutes until the onion is translucent.

Now add the ground beef to the onions and garlic, breaking the meat up gently (but not too aggressively) with your wooden spoon. Season with the additional salt and red pepper flakes then cook, stirring occasionally for about 5-8 minutes or just until the meat is browned. No need to cook it to death at this stage - you're about to boil the hell out of it.

Carefully pour in the chicken stock and raise the heat to high. Once the stock is boiling, give everything a good stir then let simmer away until the majority of the liquid has evaporated and the mixture is almost dry again (about 10 minutes.) While you wait is a good time to cook your pasta, as your pasta water should be boiling by now. Add your rigatoni, cooking ONLY to al dente - about 9 minutes.

Back to your beef mixture - once the majority of the liquid has evaporated, lower the heat to low and stir in the tomato paste, diced tomatoes, cream cheese, salt, and oregano. Combine well and keep over low heat until your pasta is cooked.  (set aside about 1/2 cup of pasta water, just in case you need to thin the sauce out.)

At this point you can either transfer the pasta to the beef mixture and stir to combine, or you can just pour the sauce over the pasta once it's on the plate or in a bowl.  Top with parmesan cheese and ENJOY!  

Monday, April 19, 2010

Pass it On Week 2: Garlic Lime Chicken

Ok, so this is not a Jamie Oliver recipe, but I believe that Jamie would give his approval for using this as my next Pass it On recipe. (If you are unfamiliar with the Food Revolution movement, check out my post from last week here)  If you want simple, if you want light, if you want healthy, if you want DEEE-licious...then you must try this recipe. Four ingredients (all fresh by the way) bring this flavorful dish together.  Other then the marinating time of 1-2 hours, this dish can be on your plate in less then 30 minutes...a perfect weeknight meal!!

The directions in this recipe call for you to run the garlic through a press if possible.  If you do not have a garlic press, then smash the clove first and chop it up as fine as you can...this will help release the oils which will help flavor the chicken.  And, if you didn't have lime or don't like lime, you can always use one small lemon instead.  This chicken is so moist (as long as you don't over cook it) it is perfect just by itself.  That's right, the sauce girl is saying this chicken needs no sauce!!  mmmmmmm....I wish there was just one more piece.....


Did I mention mmmmmmmm?  Oh yea, don't forget to "Pass it On"..........

Garlic Lime Chicken
Ingredients:
2-4 boneless, skinless chicken breasts
1/4 cup extra virgin olive oil
2 limes, zested and juiced
5 cloves of garlic, peeled and pressed through a garlic press
salt & pepper

Directions:
Place chicken in a Ziploc bag.  In a small bowl combine the olive oil, juice, zest and garlic.  Pour over chicken, seal bag, and marinate for 1-2 hours.

Preheat a grill or oven (400 degrees).  Remove chicken from bag and through out marinade.  Sprinkle chicken with salt and pepper.  Cook chicken 15-20 minutes or until no longer pink in the middle. Enjoy!   


Friday, April 16, 2010

Chocolate Peanut Butter Ice Cream

Summer is almost here!!  Well, it is here in the desert...but summer is almost here in the rest of the country too ... ALMOST!!  I love ice cream anytime of the year, but in the summer is when I crave it and/or want it the most.  My goal is to make a new ice cream every month this summer.  Let me remind you that summer lasts from pretty much April to October here in the Valley of the Sun....so be prepared!

Like my Peanut Butter Ice Cream post from last week...this was amazingly good!  What I love the most about this recipe and the last one, is that you don't have to use any eggs!  My first attempt at making ice cream about 14 years ago, I didn't temper the egg and it scrambled in my pot...icky!  Ever since then, I have been a bit scared of making homemade ice cream, even though I know what I did wrong.  So when I found these recipes by David Lebovitz, I was ecstatic!!  Also, I learned from my lack of patience last week and this batch turned out incredible.  Chris said it even had the texture and look of mass produced ice cream.  I loved that because I love mass produced ice cream :)  Ok, I love the truly homemade ice cream that my grandma use to make, but let's not go there it will just make me crave something I cannot have!

Anyway...I scream, you scream, we all scream for ice cream!!!!!  Woo Hoo!

Oh.. and in case you don't have an ice cream maker and you still want to make your own...check out David Lebovitz's site for his instructions on how!

Chocolate Peanut Butter Ice Cream
Adapted from The Perfect Scoop, by David Lebovitz by way of Tracey's Culinary Adventures
Ingredients:
2 cups half and half
1/4 cup unsweetened Dutch process cocoa powder
1/2 cup sugar
pinch of salt
1/2 cup smooth peanut butter

Directions:
Whisk together the half and half, cocoa powder, sugar and salt in a large sauce pan. Heat the mixture, whisking frequently, until it comes to a full, rolling boil (it will start to foam up). Remove from the heat and whisk in the peanut butter, stirring until thoroughly blended.

Chill the mixture thoroughly, then freeze it in your ice cream maker according to the manufacturer's instructions.

Makes about 1 quart. 


Thursday, April 15, 2010

Buttermilk Marinated Pork Chops w/ South Carolina Mustard Sauce

One thing you must know about this recipe...the mustard sauce needs to be made at least 24 hours before you serve it.  Now, I don't think there is much of a reason other then to let the flavors all blend together, so if you only had 4 hours (you'll want to marinate the pork for at least 4 hours anyway) instead of 24, you should still be ok.  I'm just putting the information out there so you will allow yourself enough time to make this dish.


I have been talking to Stephen over at The Obsessive Chef about brining pork chops.  I once tried a recipe that called for brining and I forgot to rinse off the pork, so it was extremely salty.  Since that little mess, I have been hesitant to try it again.  I realized my mistake and will be brining soon...but for this recipe, I sort of chickened out and just did a buttermilk marinade.  I was actually going to do a buttermilk brine (using salt and sugar instead of cayenne and garlic powder) but decided at the last minute to change it up.  It turned out so moist and delicious...and the sauce.. well, once again, it just adds to the dish. 

Buttermilk Marinated Pork Chops
Ingredients:
4 center cut, boneless pork chops
salt and pepper
2 cups buttermilk
2 teaspoons cayenne pepper
2 teaspoons garlic powder
South Carolina Mustard Sauce (recipe below)

Directions:
Season pork chops with salt and pepper.  Place pork chops in a resealable bag.  In a bowl, mix together buttermilk, cayenne, and garlic powder.  Pour over pork chops.  Marinate in refrigerator for at least 4 hours, but recommend from 12-24 hours.

Grill pork chops for 5 minutes on each side or until pork reaches an internal temperature of 160 degrees (you might want to pull them off before it hits 160, they will continue to cook as they rest).  Serve with South Carolina Mustard sauce... and enjoy!!


South Carolina Mustard Sauce
Adapted from Serious Eats
Ingredients:
3 Tablespoons yellow mustard
2 Tablespoons honey
1 Tablespoon apple cider vinegar
1/2 tablespoons ketchup
3/4 tablespoon brown sugar
1/2 teaspoons Worcestershire sauce
1/4 teaspoon hot sauce
1 teaspoon mayonnaise

Directions:
In a small bowl, combine all of the ingredients and mix well. Make at least 24 hours prior to usage for best flavor. Store refrigerated in a tightly covered jar for up to two weeks. 

Wednesday, April 14, 2010

Tilapia with Spiced Mustard Sauce

This dish gets it yellow-orange color, not from the mustard, but from ground turmeric.  If you have never used turmeric, let me give you a little background on it.  Turmeric is rhizomatous herbaceous perennial plant of the ginger family, Zingiberaceae. It is native to tropical South Asia and needs temperatures between 20°C and 30°C, and a considerable amount of annual rainfall to thrive.  It has become the key ingredient for many Indian, Persian, Thai and Malay dishes, not only in curry, but also in masak lemak, rendang, and many more.  In non-South Asian recipes, turmeric is sometimes used as an agent to impart a rich, custard-like yellow color.  And don't forget it's possible health benefits.  Turmeric is currently being investigated for possible benefits in Alzheimer's disease, cancer, arthritis, and other clinical disorders.

Not such a bad little plant huh?  This recipe was good.  I don't know how often I would make it, but it was worth trying, for sure.  Actually, I believe that this mustard sauce would work much better on a nice piece of salmon. I liked the flavor that the comes from the combination of the mustard and turmeric.  And knowing it's health benefits...well, makes me want to use the ingredient more and more!  And a fillet of tilapia with this sauce on it...only 105 calories and 0grams of fat!!  Can't beat that.  Now, if you didn't have turmeric and didn't want to buy it just for this dish, you could substitute ground ginger.  You aren't going to get the color, and the flavor will be a bit different, but, it's something you can use instead in a pinch.

Tilapia with Spiced Mustard Sauce
Ingredients:
2 teaspoons Dijon mustard
1 teaspoon honey
1/4 teaspoon ground turmeric
1/4 teaspoon cayenne pepper
1/8 teaspoon garlic powder
1/4 teaspoon salt
4 (4 oz) Tilapia fillets
Cooking spray

Directions:
Preheat oven to 400 degrees F.  Spray a baking dish or pan with cooking spray.  Rinse the fillets and pat dry.

Combine the first 6 ingredients together in a small bowl, mix well.  Rub the mustard sauce over both sides of the fillets and place in prepared pan.  Bake for 12-14 minutes or until the fish is cooked through.  Serve and enjoy!

(Nutritional Info - 1 fillet:  105 calories; 0g fat; 2g carbohydrates; 0mg cholesterol; 120mg sodium; 21g protein)

Tuesday, April 13, 2010

Steaks with Balsamic Vinegar, Dijon & Garlic Marinade

It's getting warm here...which means you are going to start seeing a ton of grilling recipes.  When it's 110 here in the valley of the sun, the last thing I want to do when I come home from work is heat up the kitchen.  True, it's hot standing out by the grill, but at least I have a nice cool place to retreat to when I'm finished.  When the kitchen is hot, the entire house is hot!  

Anyway.. you didn't come here for the weather, you came here for the food, right?  Well here's another hit.  This marinade wonderful!!  The steak picks up this amazing flavor that I (mostly due to me not being a good writer) cannot put it into words.  You get all the flavors of the marinade, the balsamic vinegar, the mustard, the garlic, but neither one is overwhelming.  My only suggestion, if you have more then 4 hours to marinate this, do it.  I believe the steak would then be "melt in your mouth" good!!

Steaks w/Balsamic Vinegar, Dijon & Garlic Marinade
Adapted from Aggie's Kitchen
Ingredients:
1.25 lb Chuck Tender Steaks (or any cut of your choice, I used what I had on hand)
1/4 cup Balsamic vinegar
2 TB Dijon mustard
1 TB Worcestershire sauce
3 garlic cloves, minced
salt and pepper to taste

Directions:
In a bowl, combine Balsamic vinegar, mustard, Worcestershire sauce, minced garlic and salt and pepper. Place steaks in a zip lock bag. Pour marinade into bag, making sure to coat and massage the steak with marinade. Place in refrigerator for at least 4 hours, preferably overnight and/or all day. 

Cook steaks on a preheated grill for 12-20 minutes depending on how rare or well done you want them.  Once steaks are finished cooking, allow to cool for 5 minutes before cutting into them.  Then prepare yourself... this steak has a fantastic flavor!  Enjoy!

Monday, April 12, 2010

Pass it On: The Best Barbecued Sticky Chicken with Lemon & Garlic

 
First...Chris and I were fortunate enough to be able to attend an event last night called World of Flavor, Taste 2010.  Thanks to a wonderful kick back from the company I now work for, we got to taste some of the most amazing food and wines.  I mean they had everything from amazingly tasty shrimp tacos, to sushi (my favorite), to ribs, to pizza and pasta, to the best tasting cannoli I've had in a long time (courtesy Grimaldi's Pizzeria). This event benefits the Boys & Girls Club of Metro Phoenix.  If you are unfamiliar with the Boys & Girls Club, they are about inspiring and enabling all young people, especially those who need "them the most", to reach their full potential as productive, responsible citizens.  This event began as a small dinner party and now 36 years later it attracts about 6,000 guests annually. Anyway.... it was AMAZING.  We would have never been able to actually afford to go on our own, so it was a great opportunity and so appreciated!!

Now..it's time.... for my first "Pass it On" recipe!!!  I'm so excited!!!  This dish turned out to be simple and absolutely delicious!  Wanna know another nice thing about it?  The entire meal I made cost only $11!!!  And when I say entire meal I mean, the chicken and all the ingredients (minus the olive oil and salt and pepper), potatoes, zucchini, and bread.  It was a ton of food for very little money (psst, and it actually was enough to feed 4, we had plenty left over).  If you missed Saturday's post, you probably have no clue what I'm talking about.  In short, I'm joining Jamie Oliver's Food Revolution and I'm asking that you join with me.  All you have to do is take this recipe, or any recipe of your choice, for that matter, make it, and then pass it on to someone else.  The object is to get more people not only cooking, but cooking healthy things.


As I was saying, the dish... I believe it's the best chicken dish I've had in a long time.  Honestly!  The thighs got so moist and juicy.  They just sucked up all the lemon and garlic while it roasted in the oven and then again as it quickly browned on the grill.  The flavor was light and zesty and sweet.  The garlic, because of the roasting, was subtle, yet sweet.  The combination was perfect.  So now the goal here is to have you, my loyal reader, re-create this recipe and then pass it on to someone else...have them make it and then pass it on to someone else....and so on and so on.  So, are you up for the challenge?  If you do end up making it, drop me a line letting me know what you think.  If you make it and have a blog, please bog about it and encourage others to...Pass it On!

***Cooks Note:  My mom asked me if you could use chicken breasts instead of chicken thighs...and yes, I believe chicken breasts would work just fine....but you are going to want to make sure it's bone-in, skin on..because what the sauce does to the skin is what makes the dish.  If you choose to use chicken breasts, you are going to want to roast the chicken and garlic and lemon for at least an hour, depending on the size of the breasts.***

The Best Barbecued Sticky Chicken with Lemon & Garlic
Adapted from Jamie Oliver
Ingredients:
4-8 bone-in, skin-on chicken thighs
kosher salt and ground pepper
extra virgin olive oil
1 small bulb of garlic, whole
2 lemons
5 sprigs of rosemary, tied together

Directions:
Preheat the oven to 375 degrees F.

Season the chicken with salt and pepper.  Drizzle with olive oil.  Use a double layer of aluminum foil and place the chicken into the middle of it with the garlic.  Cut one lemon in half and add that too.  Close up the foil and place on a baking sheet or in a shallow baking dish.  Place in the preheated oven and bake for 40 minutes.  Remove from oven.  (COOKS NOTE:  after further reviewing this recipe, you should actually put the bulb of garlic in the foil first, drizzle with oil, and let it roast about 15-20 minutes, THEN add the chicken and lemon to the foil, drizzle with more oil, sprinkle with salt and pepper, and allow to roast the 40 minutes or until the chicken is cooked through.)  

Preheat your grill to medium-high.

Carefully remove the garlic from the foil and squeeze the softened bulbs into a food processor.  (for an easy way of doing this, chop the root end part of the bulb off)  Remove the lemons and carefully squeeze the juice into the processor too.  Pulse a few times until the garlic is smashed.  Add about 2-4 Tablespoons of olive oil and pulse a few more times.  You should have a paste.  Add the juice of the other lemon and pulse to combine.

Place the chicken on the grill and baste with the sauce, turning at least twice for about 5-8 minutes or until the skin has browned.  Remove from grill with tongs and enjoy!